Published October 4, 2016 10:35PM
The New Point and Shoot
Taking great photos with your smartphone is getting easier. They’re small, light, and capable of taking beautiful photographs on the trail.
You’re telling your friends about the bear that darted across your path last week. “It was humungous!” you say, pulling out your phone for photographic proof. Your friends stare at the blurry dot and offer vague nods.
Taking great photos with your smartphone is hard, but it’s getting easier. Today’s phone cameras have resolutions used by pro photogs just five years ago. They’re small, light and capable of taking beautiful photographs on the trail. With a bit of prep, you just might capture the photo that has friends buying you rounds of beer. Here’s how.
3, 2, 1 …
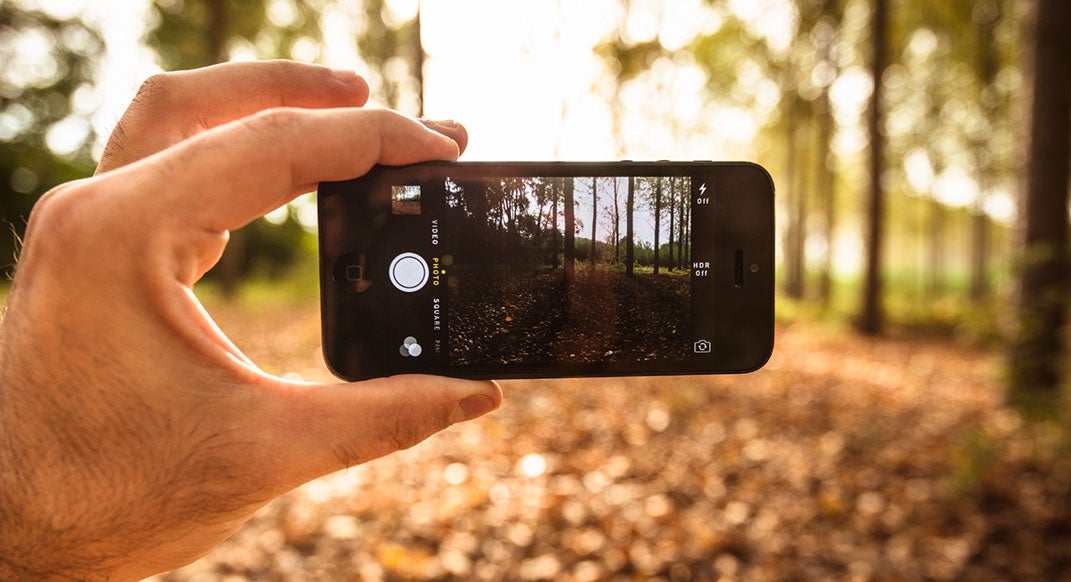
Learn your phone’s features. Know the shortcuts—for example, double-clicking the home button on most phones gets you right to the camera. (On the iPhone, look for the camera icon on the home screen or swipe up.) Learn how to focus on a specific point.
Turn the grid setting on, so you can follow the rule of thirds (see sidebar on composition basics, below).
Download a photo app. Both Android and Apple phones have a variety of free or inexpensive camera and photo-editing apps, offering improved interfaces and versatility that built-in camera functions lack, such as greater control over camera settings. “The interface should be simple and load quickly so you don’t miss the moment,” says pro outdoor photographer Joe Klementovich.
Longtime Mount Washington race photographer Joe Viger likes Snapseed. “It’s free, easy to use and fast. Control-point technology allows you to edit a particular part of a photo, and the HDR filter solves tricky lighting problems as you take the photo.” And you can quickly tweak images when you get home, if, say, it looks like a cell tower is sticking out of a runner’s head. “It’s like having a powerful computer editor on your phone,” says Viger.
ADVERTISEMENT
Choose medium or high resolution in your camera’s settings; as Klementovich points out, “Sooner or later, you’ll get a photo you’ll want to hang on the wall.”
Watch the battery. Before you run, switch to airplane mode to save precious juice.
Consider an accessory lens. An accessory lens with enhanced zoom and wide-angle features lets you capture more. The simple, lightweight Olloclip 4-in-1 is a popular choice.
Shoot!
You round a corner, only to find Anton Krupicka loping casually toward you on sweet singletrack, wavy hair floating behind him. Now’s your chance!
Own the exposure. Tap on the brightest part of the image; you’ll prevent ultra-bright spots from turning into blank, white holes.
Use “burst” mode. Hold your finger down on the photo button to take up to 10 photos per second. “You’ll be robbed if you catch your subject with closed eyes or in an awkward-looking position,” says Viger. “Shoot in bursts and save the best.”
Find new angles. If you have a moment, hop off the trail and shoot with the phone on the ground or above your head. “We all know what the trail looks like,” says photographer and elite trail runner Rickey Gates. “A different perspective takes us somewhere new.”
Skip the digital zoom. It uses an algorithm to fill the gaps and gets ugly, fast. Don’t use a filter when shooting, either; work on capturing a great image and save the processing for home.
Consider shooting in HDR. Photos shot in high dynamic range mode are actually composites of several images taken at varying exposures, which can instantly solve lighting problems and bring a high-def look to your photo. But be careful—it can sometimes make a photo look unreal or blurred.
Check your photos mid-shoot. If you didn’t get Trail Runner’s next cover, send Anton back for a second pass. Or a third.
Capture moments. “Don’t get sucked into just shooting big vistas, unless the lighting is interesting or there’s a unique angle,” says Klementovich. Instead, “Photograph faces while you’re hanging out and even when you’re having beers after. Those are memories you’ll revisit.”
RELATED: Lessons From A Budding Trail Photographer
ADVERTISEMENT
Back Home
Edit. Before sending a photo off to a magazine editor or into social-media land, do some post-production on a big screen with an editing app like Photoshop Elements or Google’s free Picasa. “A subtle touch to increase saturation and manage brightness, highlights and shadows will make all the difference,” says Viger.
Respect friends’ newsfeeds. If you’re planning to upload 50 photos from tomorrow’s run, Rickey Gates has some cautionary advice: “Do the world a favor, and only share a couple.”
Know Composition Basics
- Get your subject out of center. Use the “rule of thirds” and place subjects along one of your screen’s gridlines so it appears that they’re moving through or looking across the photo. If they’re in the center, our brain perceives them as having nowhere to go and nothing to see. That’s great if you’re looking for a peaceful, relaxed shot. But for energy, tension and a sense of movement, shift them to one side.
- Give the runner room to run in the frame, rather than having them running out of the picture.
- Mix up your angles. Shoot from any level except chest height—and, whatever you do, no butt shots.
- Use the sun. Shoot during the soft light of morning or early evening. Look for silhouettes by shooting into the sun.
- Colors matter. To make a runner pop out of a dark background, have her wear something colorful. Black is cool in SoHo, less so on a 14,000-foot ridge.
This article originally appeared in our March 2016 issue.