Published June 1, 2018 10:17PM
Hydration Pack Hygiene
Coming home from a run with a half-full hydration bladder is like coming home from school when you were a kid. You dump your bag by the front door and head straight for the refrigerator, followed by a well-deserved lounge on the couch. After a draining day of playing outside the last thing you want to do is unpack, let alone clean.
But while a backpack full of textbooks, gum wrappers and neon erasers is hardly consequential, save for an angry glare from Mom, an abandoned hydration bladder comes with more unpleasant side effects.
We’ve all tasted the funk of week-old water. Maybe we’ve shrugged it off, heading out for our run anyway, because refilling with fresh water simply seems too time-consuming. But unwashed bladders are a breeding ground for mold and bacteria, especially where electrolyte mixes or calorie supplements have been involved.
Whether you are a once-a-week or a once-a-year kind of cleaner, it’s a good idea to have a few tips up your sleeve when your hydration system goes funky.
ADVERTISEMENT
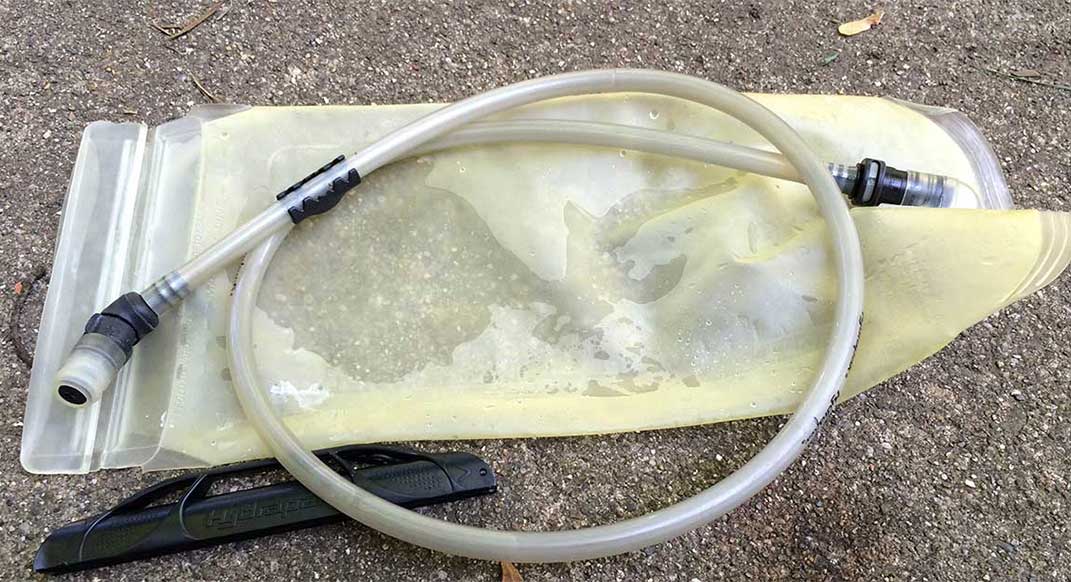
Cleaning the Reservoir
Ideally, you should empty and rinse your bladder after every use. Some bladders are dishwasher-safe. Otherwise, dump out any leftover water, and scrub the inside with mild soap—toothbrushes, baby-bottle-cleaning brushes and foam paintbrushes are all popular tools.
Flush the mixture through the hose and mouthpiece by holding the bladder above your head and squeezing the bite valve. Afterward, rinse the whole system with plain water, to get rid of any soapy residue.
ADVERTISEMENT
Inevitably, however, we go on vacation or get injured, and our bladder gets forgotten in some dark corner. Weeks later we return, gleeful, only to discover that a small puddle of electrolyte residue has turned into a full-on petri dish. To kill any lurking bacteria, mix hot (not boiling) water with baking soda and vinegar or baking soda. Vinegar gets rid of mold and mildew, while baking soda deodorizes and cleans up stains.
If you are battling particularly aggressive stains, mix the baking soda with just enough water to make a coarse paste, which you can scrub directly onto the discoloration. Otherwise, make a liquid solution, flushing some through the hose and bite valve, then letting the rest soak for at least 30 minutes.
A quick and easy alternative is to pick up a few denture-cleaning tablets from the toiletries aisle at the grocery store. Fill your bladder with water, and drop in one or two tablets. Let it sit until the tablets have dissolved and stopped bubbling, then dump and rinse with plain water.
If you find that your cleaning solution has left a lingering aftertaste in the plastic of your bladder, rinse it with water and lemon juice. The lemons will still leave an aftertaste, but a much more pleasant one.
ADVERTISEMENT
Cleaning the Tube
Many companies sell long, skinny brushes that are designed for cleaning out hydration tubes. Or, fashion a cleaning device of your own, using a piece of wire and a wet scrap of rag or paper towel. Bend the very end of the wire, so that it forms a small knot or hook, wrapping the bent end with your material of choice. Push the wire through the tube, knotted end first. Squeeze the tube in front of the wire to dislodge any … chunks, repeating with a fresh piece of cloth or paper towel, until it starts coming out clean.
You can add a splash of vinegar or bleach to the towel as well. If you do so, make sure to rinse the tube thoroughly before drying it out.
Drying It Out
Even the most rigorous cleaning routines are useless if your bladder doesn’t dry out adequately. The key is to take the system apart completely, separating the bladder, tube and mouthpiece, and removing the silicon sheath from the bite valve. Lay all of the small parts out flat to dry. If your bite valve does not come apart, simply squeeze it several times to allow any residual water to escape.
ADVERTISEMENT
Next, hang the tube so that water can drip down from each end. Use a spoon, a spatula or balled-up paper towels to prop the bladder open on a dish rack, mouth facing down. Alternatively, cut and bend a wire hanger to hold the bladder open. If you use this approach, you can also drape the tube over the hanger to drip-dry.
To catch bacterial buildup before it starts, you can also store your empty bladder in the freezer (make sure it is dry first). Bacteria and mold cannot survive in the cold temperatures. This method works great if you use your bladder frequently; don’t plan on storing the bladder in the freezer for more than a few days, as it may affect the integrity of the materials.